Icon Tools
Last updated on 10 hours ago
miker1264Software Dev
Posted 10 hours agoThis file contains the code needed to complete the functions producing a neon glow border.
At the top of the text file is some random test data. I was trying to work out the formula for darkening glow pixels to simulate adding black. When the original image with the black Shadow border is composited over the glow mask the pixels are blended or darkened to give the glow border a 3D effect.
The pseudo code and notes at the bottom are how I intend to do the image compositing function.
Please don't try to compile the code. It doesn't do anything in particular. It's just a sample. ;-)
By the weekend I'll post my AddGlow program. You can compile that code. It's a command line app that adds a neon glow based on a drop shadow.
At the top of the text file is some random test data. I was trying to work out the formula for darkening glow pixels to simulate adding black. When the original image with the black Shadow border is composited over the glow mask the pixels are blended or darkened to give the glow border a 3D effect.
The pseudo code and notes at the bottom are how I intend to do the image compositing function.
Please don't try to compile the code. It doesn't do anything in particular. It's just a sample. ;-)
By the weekend I'll post my AddGlow program. You can compile that code. It's a command line app that adds a neon glow based on a drop shadow.
Edited by miker1264 on 25-08-2026 13:13, 10 hours ago
miker1264 attached the following file:
icon_builder_notes_08-24-26.zip [1.79kB / 5 Downloads]
miker1264Software Dev
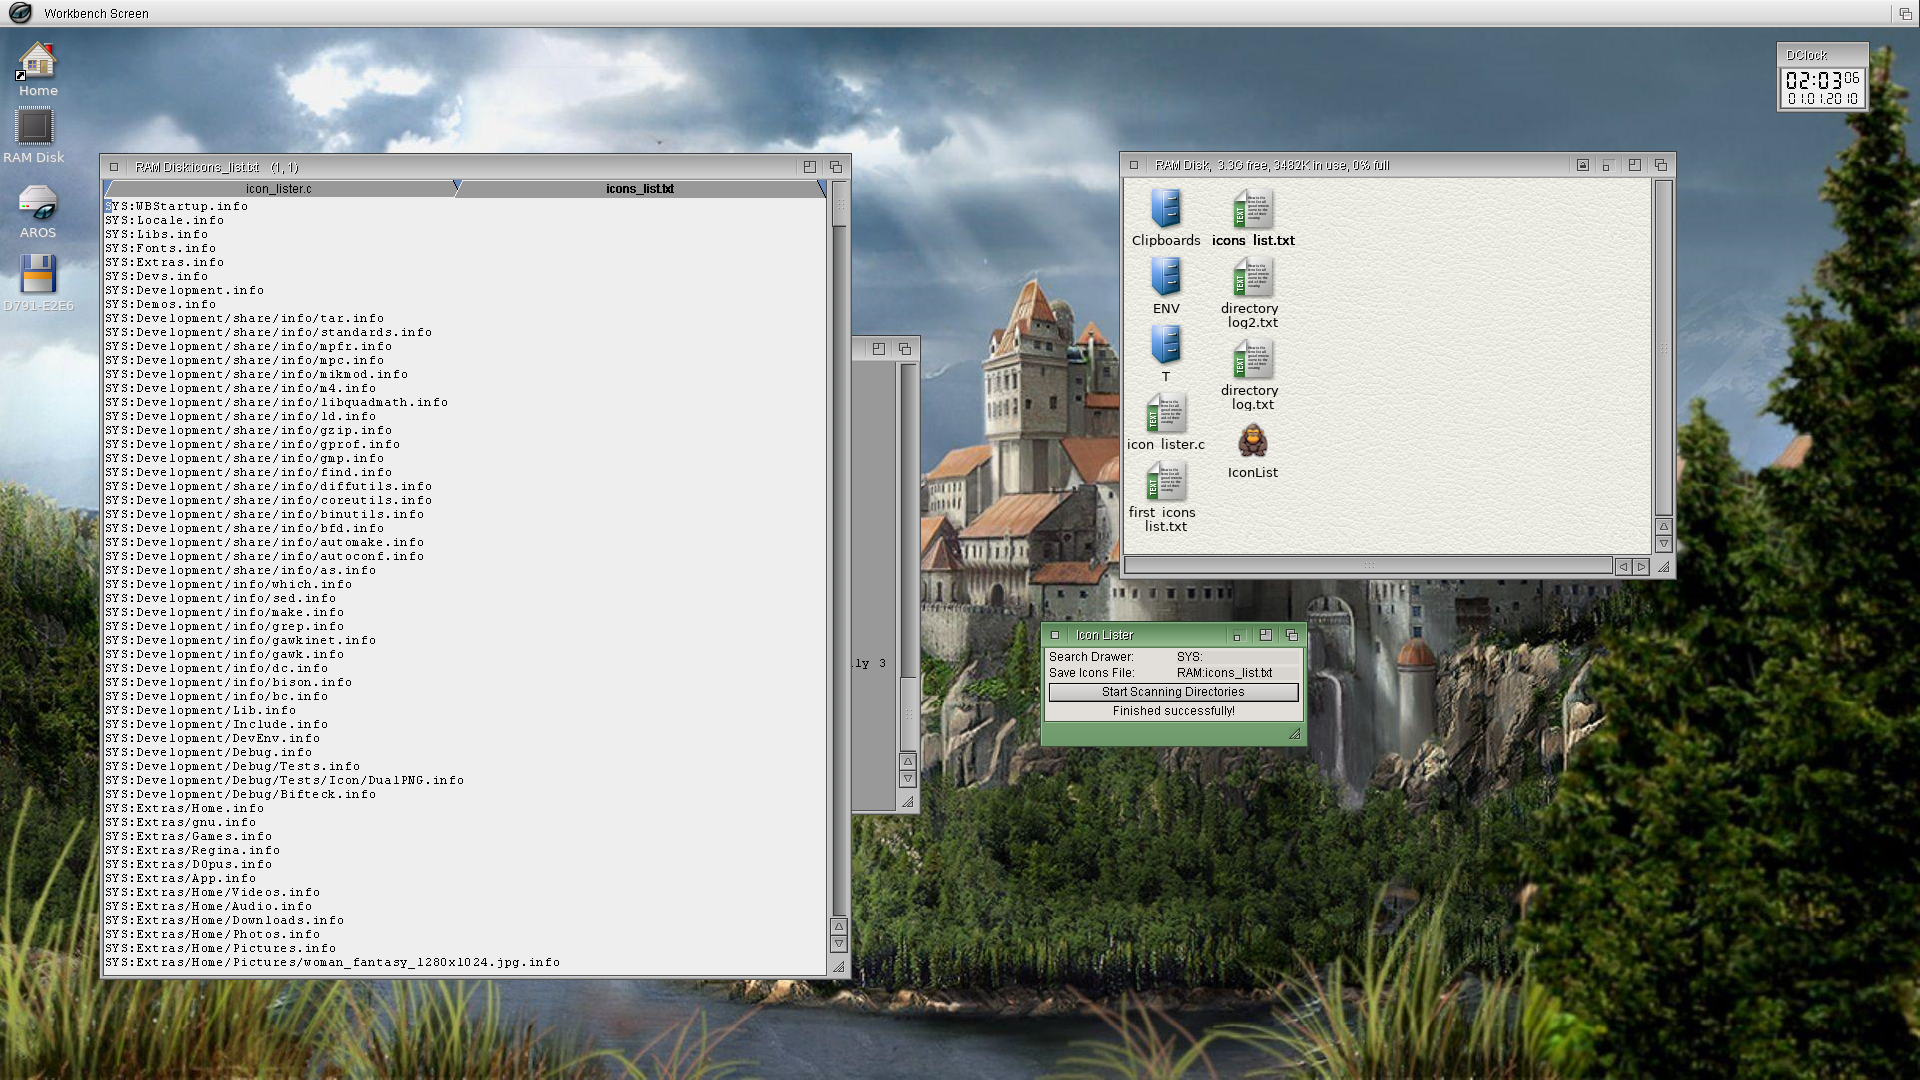
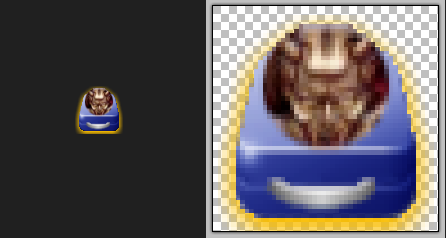
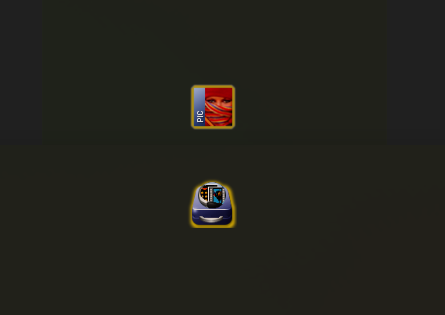
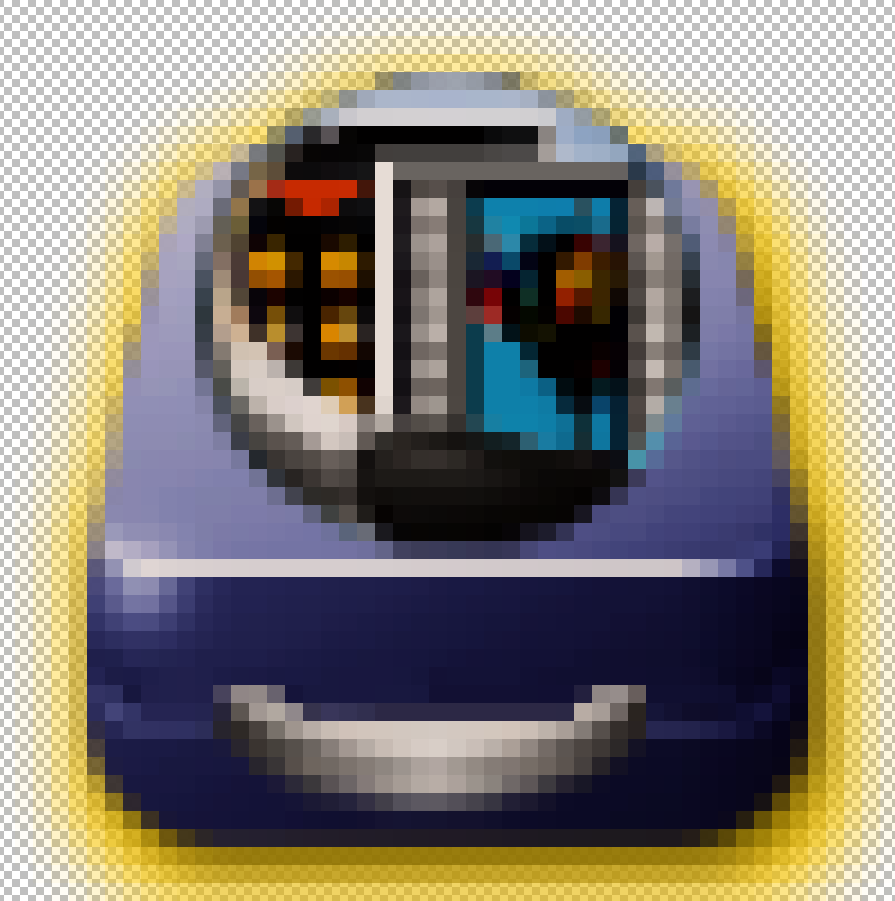
Posted 2 days agoHere is a sample of the neon glow masks made from shadow borders.
I will need to use a non-offset, larger shadow mask for a larger glow size. I also meed to do the alpha intensity.
But it's getting closer...
The image on the left has the shadow template. The image on the right with the glow border is the one we are trying to match. The others are neon glow mask samples.
I'll post the code here when it all works. Now you know the concept.
I will need to use a non-offset, larger shadow mask for a larger glow size. I also meed to do the alpha intensity.
But it's getting closer...
The image on the left has the shadow template. The image on the right with the glow border is the one we are trying to match. The others are neon glow mask samples.
I'll post the code here when it all works. Now you know the concept.
miker1264Software Dev
Posted 2 days agoI'll be starting a new Topic for Small Icon Tools which are command line utilities for making or modifying icons. I will provide the source code as well as 32bit & 64bit binaries. It would be easy enough for anyone to combine the source code in a GUI.
For making neon glow borders I have a new method that I think will work. Whereas adding glow borders to Ken's v4 Icon is like using a sniper rifle in a video game, it's very precise. But making a neon glow is like a Shotgun Effect, it's quick but requires less presision and it's easy.
In order to make a neon glow we start with adding a Shadow Template which is basically a Shadow Border that isn't offset, it's centered on the image instead. The shadow pixels are all black with varying alpha values. It's also called an Alpha Mask. The purpose of the Shadow Template is to scatter the alpha values that will be used later.
For the glow effect, using the Shadow Template, we replace black pixels in the alpha mask with the selected glow tint. Such as if we use Aqua Glow Tint the rgb is (0,255,255). For each black Shadow Pixel we replace (0,0,0) with (0,255,255) which creates an Aqua Glow Mask. We can use any Glow Tint that we know the RGB values.
The Neon Glow Mask alone is not enough to produce the Neon Effect. We need to darken certain pixels & blend fringe pixels to give a 3D look. When we combine the original image with the mask we do blending.
Since the alpha mask aka Shadow Mask is composed of black pixels in orden to blend them with the Neon Glow Pixels we simply darken the Glow Pixel to simulate adding black. In Color Theory adding White lightens a pixel and it's called a "Tint". Adding black darkens it and it's called a "Shade". So we simulate adding black. For fringe pixels around the RGB Icon Image that are not black but have alpha values >0 but <255 we do real Linear Blending.
Using the Shadow Template to produce the Neon Glow Mask then Compositing the images and doing pixel blending with the Original Shadow Pixels it produces a nice 3D looking Neon Glow Border.
That's what I'm working on now. :-)
For making neon glow borders I have a new method that I think will work. Whereas adding glow borders to Ken's v4 Icon is like using a sniper rifle in a video game, it's very precise. But making a neon glow is like a Shotgun Effect, it's quick but requires less presision and it's easy.
In order to make a neon glow we start with adding a Shadow Template which is basically a Shadow Border that isn't offset, it's centered on the image instead. The shadow pixels are all black with varying alpha values. It's also called an Alpha Mask. The purpose of the Shadow Template is to scatter the alpha values that will be used later.
For the glow effect, using the Shadow Template, we replace black pixels in the alpha mask with the selected glow tint. Such as if we use Aqua Glow Tint the rgb is (0,255,255). For each black Shadow Pixel we replace (0,0,0) with (0,255,255) which creates an Aqua Glow Mask. We can use any Glow Tint that we know the RGB values.
The Neon Glow Mask alone is not enough to produce the Neon Effect. We need to darken certain pixels & blend fringe pixels to give a 3D look. When we combine the original image with the mask we do blending.
Since the alpha mask aka Shadow Mask is composed of black pixels in orden to blend them with the Neon Glow Pixels we simply darken the Glow Pixel to simulate adding black. In Color Theory adding White lightens a pixel and it's called a "Tint". Adding black darkens it and it's called a "Shade". So we simulate adding black. For fringe pixels around the RGB Icon Image that are not black but have alpha values >0 but <255 we do real Linear Blending.
Using the Shadow Template to produce the Neon Glow Mask then Compositing the images and doing pixel blending with the Original Shadow Pixels it produces a nice 3D looking Neon Glow Border.
That's what I'm working on now. :-)
miker1264Software Dev
Posted 4 days agoWhile trying to add a method to an existing icon maker GUI I accepted a challenge to come up with a method to draw a neon glow border to add it to an existing icon image.
My Icon Builder program already has a suitable method to draw new glow borders for Ken's v4 46x46 icons but that is too complicated. Now I have a new concept for neon glow border.
Edited by miker1264 on 22-08-2026 10:26, 4 days ago
miker1264Software Dev
Posted 5 days agoAMIGASYSTEM
I will integrate the code to get the Color index into the GUI tomorrow.
I spent the evening working on my Build System for ABIv11.
P.S. - It's really hot in my Home Office where I do my computer work and where I do my AROS development. It's about 90 deg F in this room, or 32 deg C. I'm sweating it for AROS!
I will integrate the code to get the Color index into the GUI tomorrow.
I spent the evening working on my Build System for ABIv11.
P.S. - It's really hot in my Home Office where I do my computer work and where I do my AROS development. It's about 90 deg F in this room, or 32 deg C. I'm sweating it for AROS!
Edited by miker1264 on 20-08-2026 23:12, 5 days ago
miker1264Software Dev
Posted 5 days ago@AMIGASYSTEM - I tried compiling getglowcolors_sample natively, but I'm getting errors!
It's not compilable as is. It's a snippet of code. It's just a basic framework that is intended to be included or I should say integrated into the GUI.
I'll integrate the code with the GUI to show what I mean.
I tried compiling getglowcolors_sample natively, but I'm getting errors!
miker1264Software Dev
Posted 5 days agoAs for the GUI for IconMake here is the code that I wrote to connect the selected glow tint to the actual glow colors for each of the color bands in the glow mask. The 24bit glow mask is used to make the 32bit glow border by applying a blur effect.
miker1264 attached the following file:
getglowcolors_sample.zip [1.13kB / 20 Downloads]
miker1264Software Dev
Posted 11 days agoUsing Icon Builder it's a very subtle Neon Orange Glow.
The other colors will be added.
Some adjustments are needed.
The other colors will be added.
Some adjustments are needed.
Edited by miker1264 on 14-08-2026 13:12, 11 days ago
miker1264Software Dev
Posted 14 days agoFor AddNeonGlow I analyzed one of the AROS One png Glow Icons. You may not notice anything particular about it, but it appears to be similar to the Black Drop Shadow technique.
Rather than using Detect Contour & Draw Glow Mask as I did for Ken's v4 icons the procedure for neon glow borders may be greatly simplified. The glow mask would simply be a colored silhouette the same size as the rgb icon image. Apply the blur effect & do some alpha blending.
I'll do some more testing in the next few days to see if I can replicate the neon orange glow border sample.
Rather than using Detect Contour & Draw Glow Mask as I did for Ken's v4 icons the procedure for neon glow borders may be greatly simplified. The glow mask would simply be a colored silhouette the same size as the rgb icon image. Apply the blur effect & do some alpha blending.
I'll do some more testing in the next few days to see if I can replicate the neon orange glow border sample.
miker1264Software Dev
Posted 15 days ago@AMIGASYSTEM - Great, miker. Regarding IconMake: since there are no tools for creating icons in AROS 64-bit v11, I’ll be releasing IconMake for now, and it will be included in the upcoming AROS One 1.4. Once the version of IconMake that you’ve improved is ready, we’ll release it under a different name.
That's a good idea to release the first version. Then add some updates and improvements later.
Great, miker. Regarding IconMake: since there are no tools for creating icons in AROS 64-bit v11, I’ll be releasing IconMake for now, and it will be included in the upcoming AROS One 1.4. Once the version of IconMake that you’ve improved is ready, we’ll release it under a different name.
miker1264Software Dev
Posted 15 days agoRecently I've started working on Icon Builder and the small cli apps that accompany it - such as AddGlow, AddShadow and AddNeonGlow. The last one is a recently added project.
AddNeonGlow is based in part on AddShadow which uses a black and white monochrome shadow mask. AddNeonGlow changes the color so instead of black it may be orange. :-)
This new procedure to add a neon glow border started when @AMIGASYSTEM sent me some sample icons from AROS One to add glow borders for his Icon Make GUI.
AddNeonGlow is based in part on AddShadow which uses a black and white monochrome shadow mask. AddNeonGlow changes the color so instead of black it may be orange. :-)
This new procedure to add a neon glow border started when @AMIGASYSTEM sent me some sample icons from AROS One to add glow borders for his Icon Make GUI.
Edited by miker1264 on 11-08-2026 11:06, 15 days ago
miker1264Software Dev
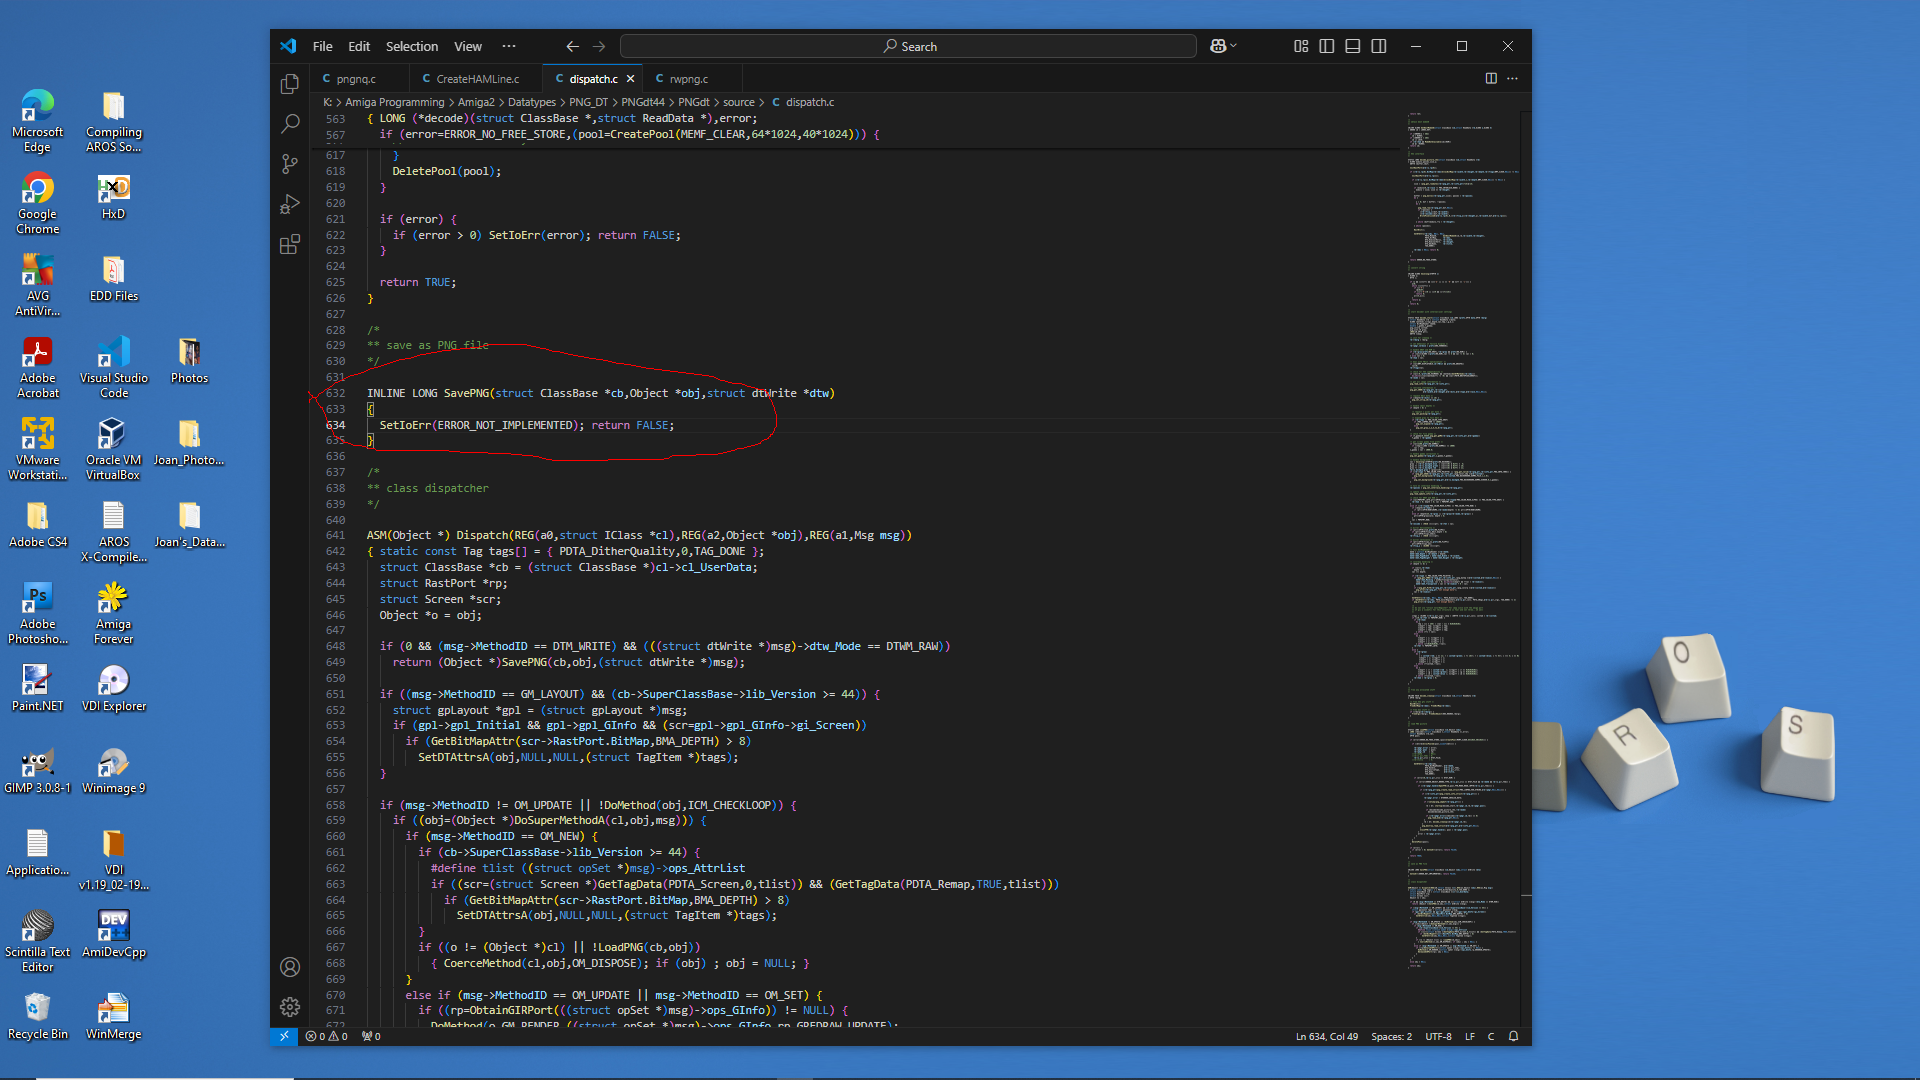
Posted 3 months agoNow I know why the OS 3.9 PNG datatype only Saves as ILBM.
See the screenshot...
SavePNG is Not Implemented.
At a later time I will setup Amiga-gcc cross compiler and try to fix the datatype by adding a save function.
In the meantime I can use rwpng.c provided with png_nq for Amiga which is part of PNG_Neuquant from libpng. It allows reading/writing PNG.
It seems ironic! For all the testing over the last week or two for using Datatypes to save a PNG image for the 68k version of Icon splitter, the Amiga Datatypes code works and now picture.datatype work but PNG datatype is incomplete to SavePNG.
So for icon Splitter I'll use rwpng instead till I have time to fix the PNG datatype. So much fun 😊
PS - I may need to install Bebbo's Amiga-gcc cross compiler for Amiga 68k to try to fix the Datatypes. It should be no different than compiling AROS 68k code.
See the screenshot...
SavePNG is Not Implemented.
At a later time I will setup Amiga-gcc cross compiler and try to fix the datatype by adding a save function.
In the meantime I can use rwpng.c provided with png_nq for Amiga which is part of PNG_Neuquant from libpng. It allows reading/writing PNG.
It seems ironic! For all the testing over the last week or two for using Datatypes to save a PNG image for the 68k version of Icon splitter, the Amiga Datatypes code works and now picture.datatype work but PNG datatype is incomplete to SavePNG.
So for icon Splitter I'll use rwpng instead till I have time to fix the PNG datatype. So much fun 😊
PS - I may need to install Bebbo's Amiga-gcc cross compiler for Amiga 68k to try to fix the Datatypes. It should be no different than compiling AROS 68k code.
Edited by miker1264 on 18-05-2026 15:08, 3 months ago
miker1264Software Dev
Posted 3 months agoSuccess!! It's a beautiful thing when the code works correctly. :-)
I had to get my Datatypes code to work correctly for Amiga 68k so I can update my Icon Splitter app for AROS 68k and Amiga. But I had some difficulty along the way over the past week or so. Nothing I did seemed to work as expected.
I narrowed it down then I discovered the problem. The picture.datatype that I was using for Amiga OS3.9 was corrupted. So I replaced it with the picture.datatype that comes with Picasso96. Then it worked perfectly!
The BMP datatype and PNG datatype still have issues though. These are the ones written by Gunther Nikl many years ago. The save functions for those Datatypes aren't working. BMP doesn't save anything and PNG datatype saves ILBM instead of PNG. I have the source code for both Datatypes to look at to see why this happens.
In the meantime I have a program that uses PNG library to read and write PNG files directly. So I can use that and I can use native Read BMP and Write BMP in my application. The Targa Datatype may be working. And far as I can see JPEG works.
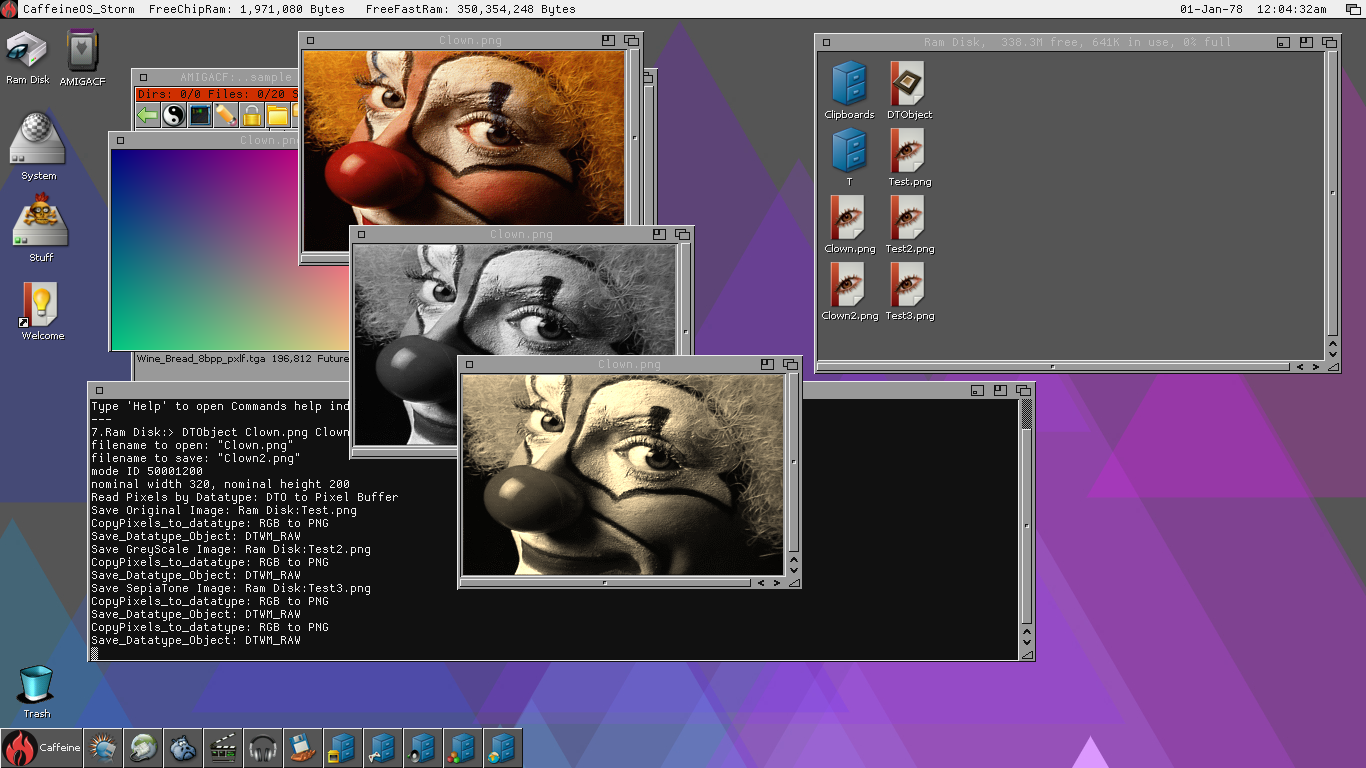
I attached a screenshot of my AROS Datatypes code and my GreyScale and SepiaTone functions from PixieView working on Amiga 68k.
I'm using AddDTObject to add it to the window to display the images. This is the method AROS MultiView uses. It also allows PDTM_Scale to resize the datatype image data so you resize the image using a window size gadget. That's a nice feature!
Now I can move forward to port PixieView to AROS 68k and Amiga.
I had to get my Datatypes code to work correctly for Amiga 68k so I can update my Icon Splitter app for AROS 68k and Amiga. But I had some difficulty along the way over the past week or so. Nothing I did seemed to work as expected.
I narrowed it down then I discovered the problem. The picture.datatype that I was using for Amiga OS3.9 was corrupted. So I replaced it with the picture.datatype that comes with Picasso96. Then it worked perfectly!
The BMP datatype and PNG datatype still have issues though. These are the ones written by Gunther Nikl many years ago. The save functions for those Datatypes aren't working. BMP doesn't save anything and PNG datatype saves ILBM instead of PNG. I have the source code for both Datatypes to look at to see why this happens.
In the meantime I have a program that uses PNG library to read and write PNG files directly. So I can use that and I can use native Read BMP and Write BMP in my application. The Targa Datatype may be working. And far as I can see JPEG works.
I attached a screenshot of my AROS Datatypes code and my GreyScale and SepiaTone functions from PixieView working on Amiga 68k.
I'm using AddDTObject to add it to the window to display the images. This is the method AROS MultiView uses. It also allows PDTM_Scale to resize the datatype image data so you resize the image using a window size gadget. That's a nice feature!
Now I can move forward to port PixieView to AROS 68k and Amiga.
2 users reacted to this post
retrofaza, Deremon
miker1264Software Dev
Posted 3 months agoThere must be something wrong with the Datatypes system on Amiga OS 3.9. When I get a datatype object of a PNG image then save it directly using DTM_RAW it saves correctly. When I use PDTM_ReadPixelArray to get pixel data it is corrupted.
When I modify a pixel buffer with a gradient test image then copy to the same datatype object using the PDTM_WritePixelArray it seems ok. But when I save it afterwards with DTM_RAW it should save a PNG. But for some reason it saves as ILBM.
Is there something wrong with the picture.datatype? The same code works on AROS but not OS 3.9 !!
When I modify a pixel buffer with a gradient test image then copy to the same datatype object using the PDTM_WritePixelArray it seems ok. But when I save it afterwards with DTM_RAW it should save a PNG. But for some reason it saves as ILBM.
Is there something wrong with the picture.datatype? The same code works on AROS but not OS 3.9 !!
miker1264Software Dev
Posted 3 months agoI added more Datatypes functions to the DTObject test program getting ready to update Icon Split for Amiga 68k & AROS 68k. At the moment it saves ARGB image data as TARGA instead of using Datatypes to save as PNG. There will also be some internal updates to bring it up to the current code of Icon Split for AROS 32bit. Then after the updates I'll try to compile the code for AROS 64bit.
Although the Datatypes code for the DTObject test program is working the display method isn't doing well. The image is remapped and dithered which is not the desired effect.
At a later date I'll continue to find a solution for displaying 24bit/32bit images on RTG screens on Amiga. I suspect I'll need to open a custom screen whose depth and dimensions match the image to be displayed. The window dimensions match the screen exactly and it uses the custom RTG screen that was opened already. When it's time to display the image move the screen to the front over the workbench screen then use BltBitMapRastPort to draw it in the rasterport. That should work well.
Although the Datatypes code for the DTObject test program is working the display method isn't doing well. The image is remapped and dithered which is not the desired effect.
At a later date I'll continue to find a solution for displaying 24bit/32bit images on RTG screens on Amiga. I suspect I'll need to open a custom screen whose depth and dimensions match the image to be displayed. The window dimensions match the screen exactly and it uses the custom RTG screen that was opened already. When it's time to display the image move the screen to the front over the workbench screen then use BltBitMapRastPort to draw it in the rasterport. That should work well.
miker1264Software Dev
Posted 3 months agoI've successfully setup a new 4GB CF card for testing! It at first showed up as CF0:Nondos so I had to do a quick fat95 format then it worked.
But my Picasso96 code didn't work. There are other drawing methods. I'll keep trying till something works. :-)
I will make frequent backups of the test data on my CF Card going forward. I don't want to lose any valuable source code!
But my Picasso96 code didn't work. There are other drawing methods. I'll keep trying till something works. :-)
I will make frequent backups of the test data on my CF Card going forward. I don't want to lose any valuable source code!
Edited by miker1264 on 09-05-2026 14:55, 3 months ago
miker1264Software Dev
Posted 4 months agoThe last few days have been frustrating, challenging and rewarding all at the same time!
I'm trying to update my Icon Splitter for Amiga OS 3.x but I have had several issues on the Amiga side.
In addition to trying to get the picture Datatypes to work correctly I was also trying to find an accurate method to draw RGB & ARGB images to the RTG rasterport of Caffeine OS which is Amiga OS 3.9 but it didn't go well at first. Adding a datatype to the window used dithering which caused the image to look terrible. Maybe the original AGA chipset and libraries only supported up to 8bit bitmaps? I'm not sure.
Then I did more research and I realized I had two main options -Cybergraphx or Picasso96. As far as the first option I'm used to using WritePixelArray & WritePixelArray alpha on AROS with Cybergraphx. But Caffeine OS uses Picasso96 & the two RTG solutions don't play well together on the same system.
Then doing more research I discovered I can use p96WritePixelArray for drawing purposes & that since early versions Picasso96 offered a framework to intercept Cybergraphx function calls to use its own functions instead. So it's Cybergraphx code on Picasso96. I was just about to test that when the 2GB CF Card I was using to transfer Program data, test images & test icons to and from my A1200 took a dump! I lost most of my data.
However, I'm trying to reconstitute the data on another CF Card for testing. I hesitate to use HD floppy disk to transfer data. It's such a pain! The good news is my Picasso96 code to draw to the RTG screen did finally compile correctly. But does it work? That's the question!!
I'm trying to update my Icon Splitter for Amiga OS 3.x but I have had several issues on the Amiga side.
In addition to trying to get the picture Datatypes to work correctly I was also trying to find an accurate method to draw RGB & ARGB images to the RTG rasterport of Caffeine OS which is Amiga OS 3.9 but it didn't go well at first. Adding a datatype to the window used dithering which caused the image to look terrible. Maybe the original AGA chipset and libraries only supported up to 8bit bitmaps? I'm not sure.
Then I did more research and I realized I had two main options -Cybergraphx or Picasso96. As far as the first option I'm used to using WritePixelArray & WritePixelArray alpha on AROS with Cybergraphx. But Caffeine OS uses Picasso96 & the two RTG solutions don't play well together on the same system.
Then doing more research I discovered I can use p96WritePixelArray for drawing purposes & that since early versions Picasso96 offered a framework to intercept Cybergraphx function calls to use its own functions instead. So it's Cybergraphx code on Picasso96. I was just about to test that when the 2GB CF Card I was using to transfer Program data, test images & test icons to and from my A1200 took a dump! I lost most of my data.
However, I'm trying to reconstitute the data on another CF Card for testing. I hesitate to use HD floppy disk to transfer data. It's such a pain! The good news is my Picasso96 code to draw to the RTG screen did finally compile correctly. But does it work? That's the question!!
Edited by miker1264 on 09-05-2026 11:55, 3 months ago
You can view all discussion threads in this forum.
You cannot start a new discussion thread in this forum.
You cannot reply in this discussion thread.
You cannot start on a poll in this forum.
You cannot upload attachments in this forum.
You can download attachments in this forum.
You cannot start a new discussion thread in this forum.
You cannot reply in this discussion thread.
You cannot start on a poll in this forum.
You cannot upload attachments in this forum.
You can download attachments in this forum.
Moderator: Administrator, Moderators