AMIGASYSTEMDistro Maintainer
Posted
1 year agoOK thanks, I'll create the icons for AROS One in the meantime!
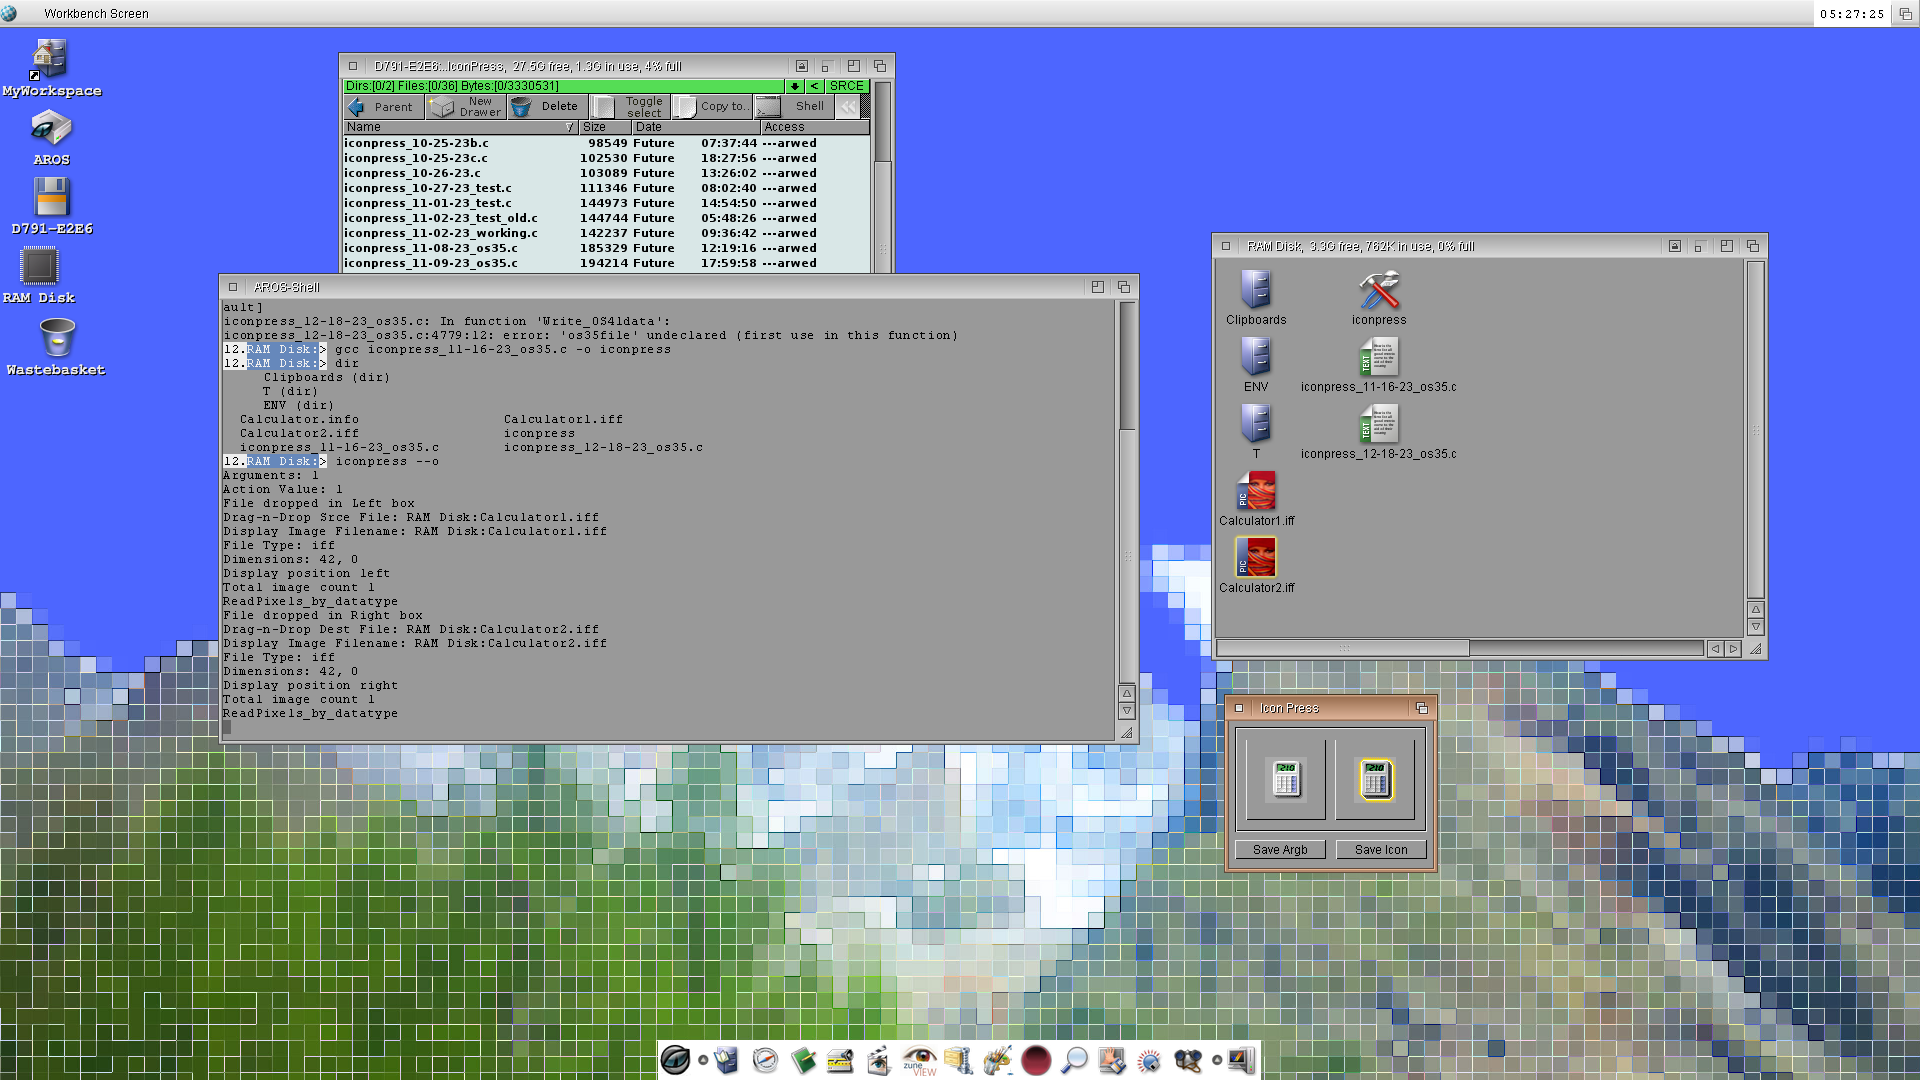
Now that another project using Datatypes has been completed I can focus again on Icon Press to attempt to save an Amiga Glow Icon from two input ILBM images. It's coming along nicely, but it's a slow iterative process. It takes some time!
miker1264 attached the following image:
I'm still working on revising & testing Icon Press to Save Amiga Icons, as well as a user interface for Icon Split that will be Amiga 68k compatible.
Now that I'm fixing up my testing environments including AROS One x86 & Tiny AROS & my new version of a minimalist AROS Distro. I'm still working on improving it & updating the icons & making new window themes. You have already seen a sample screenshot. Here it is again...
I need some new & updated colored icons so now I also need new icon tools. These will be Icon Mask, Icon List, Icon Tint & Icon Batch. Icon List builds a list of all the icons on the system.
Icon Mask & Icon Batch are related. Icon Mask uses an original icon image, icon image mask & icon base image to make a new icon image. Icon Batch does the same but it makes & builds all the icon images in the list & it assembled icons. Icon Batch can make & assemble 400 images to make 200 new icons in less than one minute!
miker1264 attached the following image:
Happy New Year!
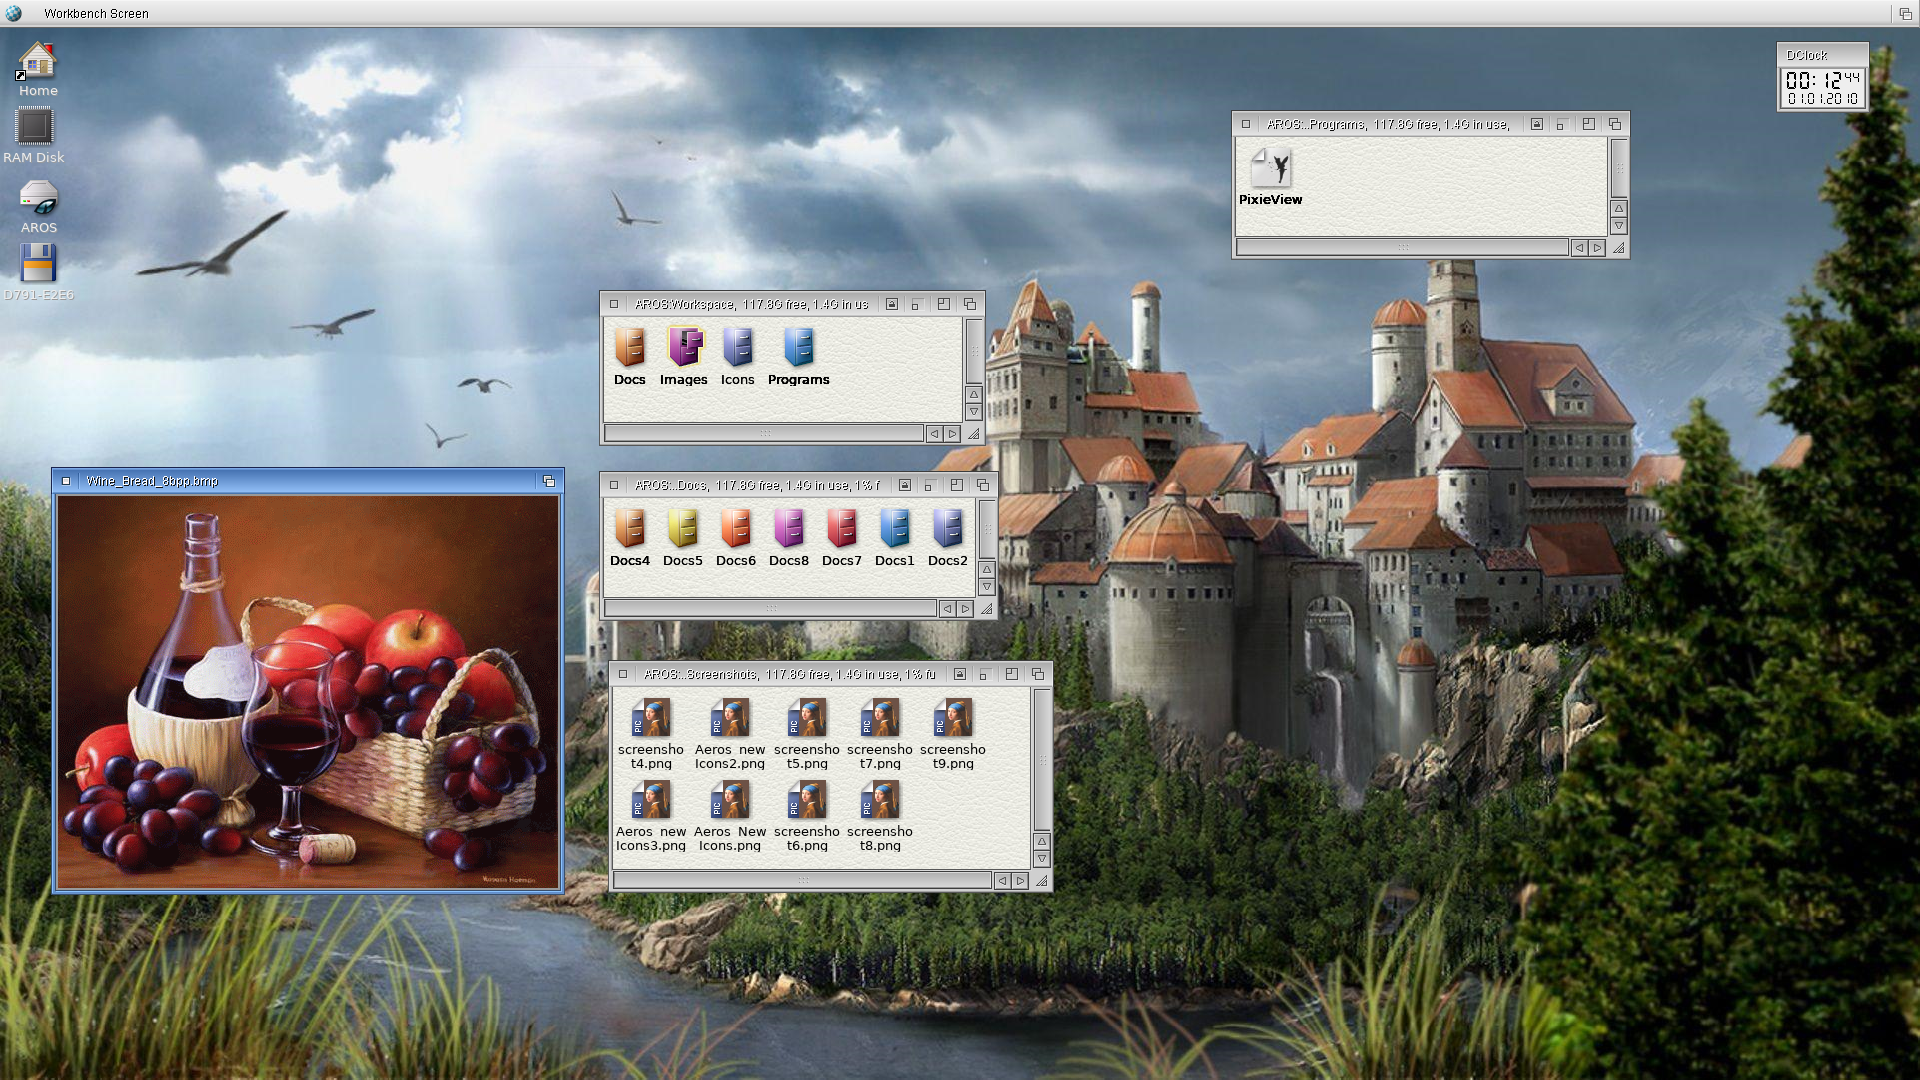
Just a small update. I'm still working on Icon Press to Save A Classic Icon (Amiga Icon).
The Save_Amiga_Icon functions are coming along nicely! For the sub-functions other than Write_OS35data the second most difficult for me was the Write_Image function which writes planar data to file. There are just a few functions left to do till Save_Amiga_Icon is done. I've been working on Save_Amiga_Icon for 6 months.
Why is it so important to save an Amiga Icon? The Classic Icon is the basis for three of the Icon styles supported by AROS. The Amiga Glow Icon is a Classic Icon (Old Icon Format) with OS 3.5 IFF Icon Data attached at the end. The IFF data contains the images that AROS displays. An OS4 icon is a Classic Icon with OS 3.5 Data attached. But unlike a Glow Icon it only has a 'FACE' chunk with no 'IMAG' chunks. It has 2 'ARGB' chunks at the end of the Icon file that are used to display. The AROS Hybrid Icon or ARGB Icon is similar to the OS4 Icon but it has a complete Glow Icon that 2 ARGB chunks are attached to at the end.
Write_Image is now working. Save_Amiga_Icon loads an ILBM file to get the chunky image data which consists of index values. The image data is processed by RemapIconImage which maps the index values to a standard 4-color palette. Write_Image then writes the planar data to file.
In the screenshot on the lower right side there are 2 small Windows displaying icons. I used the VIEW option for modifyicon to display the Old Icon Images & Glow Icon Images to make sure Write_Image was working correctly. At first it wasn't. The first set of images shows distortion for the Old Icon Images, though the Glow Icon Images are shown correctly.
The distortion for the Gadget Images is caused by incorrectly handling the padding bytes at the end of each scanline for the planar data. I tried to go the easy route by writing the entire planar buffer to file in one go. This is the result.
In the second set of images you see that the Gadget Images & Glow Icon Images are shown correctly. I had to revise Write_Image to write each scanline separately with padding bytes.
Edited by miker1264 on 09-01-2025 15:17,
1 year ago
miker1264 attached the following image:
It's been a while since I worked on AROS programs. About this time last year I started looking for a new place of employment. Many things have happened since then. But it's good to be back. I have been checking the forum from time to time and I've seen some good projects.
I'm working on Icon Builder again and I've made some progress. A year ago I had a problem with the blur effect. I'll explain in more detail.
miker1264 attached the following image:
For the Icon Builder program after the Glow Mask has been created using the chain code from the Image Tile the next step is to import the RGB Glow Mask into Photoshop then set layer opacity =70 and do Filter / Blur / Blur twice to produce the 32 bit Glow Border. That's the method Ken was using for making icons.
But it's not reasonable to require AROS users to get and install a copy of Photoshop to do the blur effect. Instead that function should be done in the program itself. But the difficulty is trying to guess what code is being used for the Photoshop Blur Effect.
At first I thought it was a simple Box Blur but that wasn't it. Yesterday I discovered that a Gaussian Blur with radius 0.50 creates a nearly perfect ARGB Glow Border! Now I just have implement a Gaussian Blur algorithm and continue testing. ;-)
The end result will be to easier add a realistic Glow Border to an icon image.
miker1264 attached the following image:
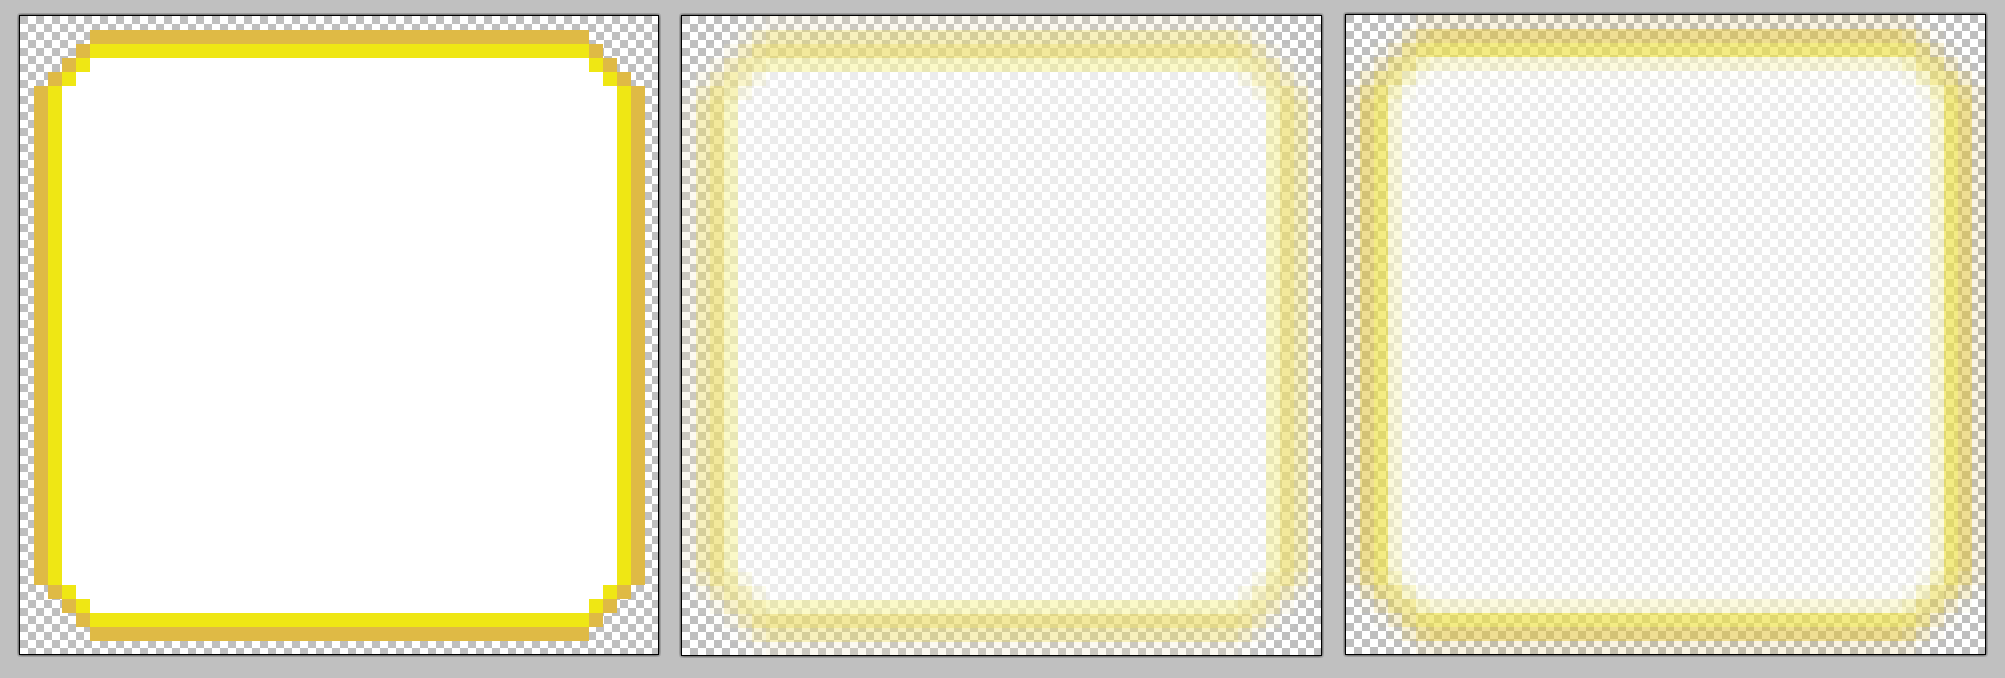
The blur effect is working in Icon Builder to convert the Glow Mask into a 32 bit Glow Border but the blur intensity is too much for small images. The algorithm needs to be adjusted. But the screenshot shows the current progress.
The image on the left is the Glow Mask. The image in the middle is generated by the Icon Builder internal blur effect. The image on the right is from Photoshop. The one on the right is correct. That's the goal.
miker1264 attached the following image:
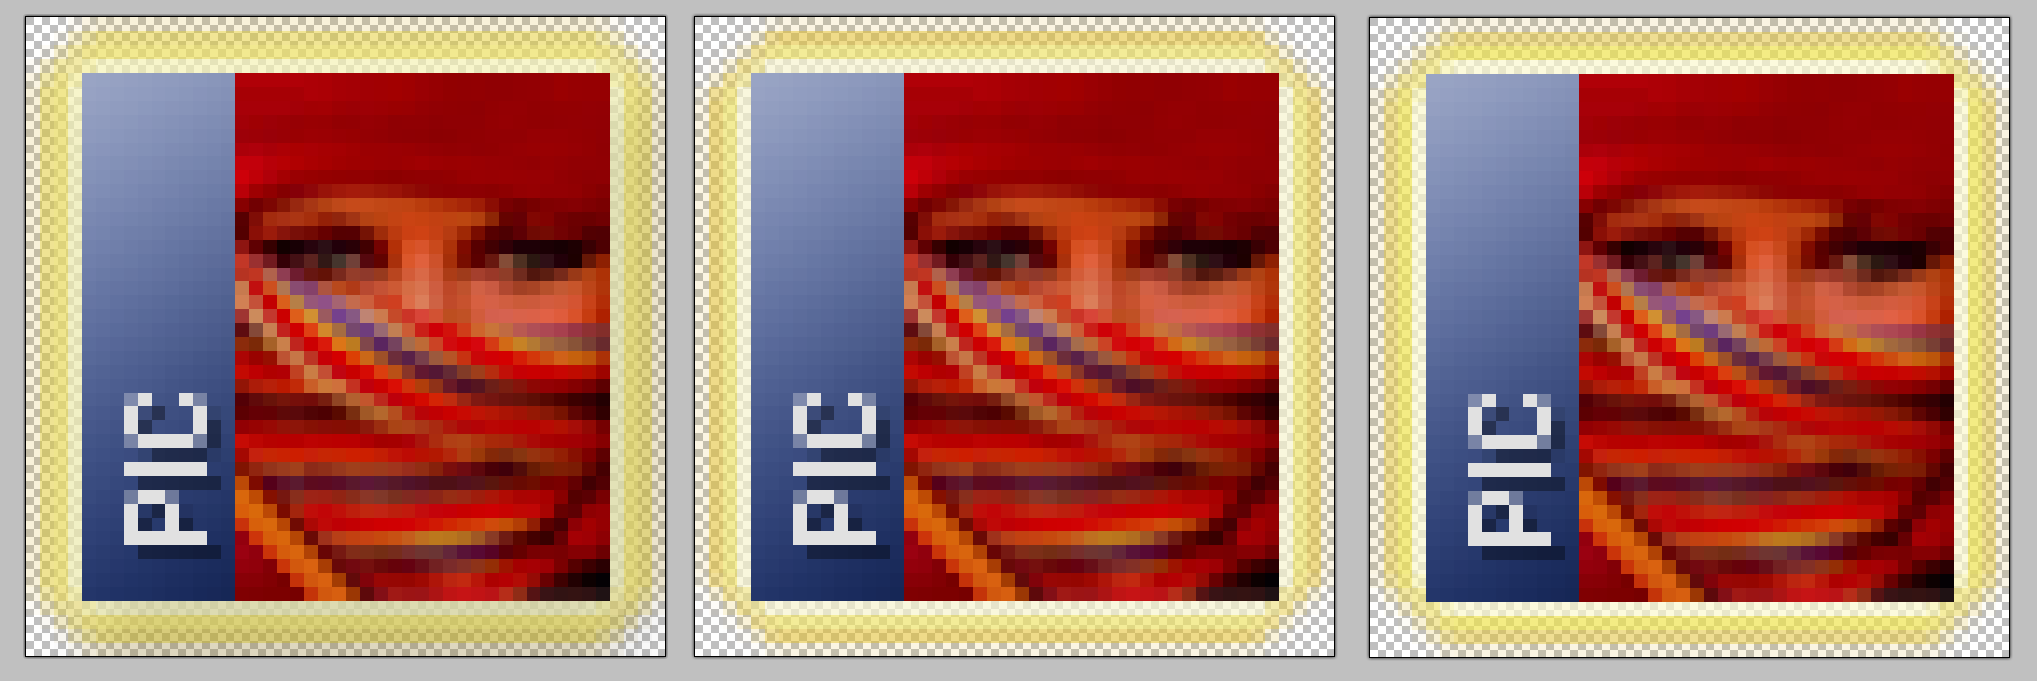
Icon Builder is progressing. You have to zoom in to see the glow borders.
The image of def_Picture on the left has the original glow border. It's more yellow-ish. The image in the middle has a glow border produced by the blur effect in Photoshop. And the image on the right has a glow border that I produced without using Photoshop. It seems nearly identical to the glow border from Photoshop.
It's perfectly ok that the 'modern' glow border has a slight orange tinge to it and the older one is more yellow-ish. It's easier to decide which one is the result of new glow masks.
Also, over the weekend I fixed a display issue that involved dragging and dropping images with 32 bit glow borders with varying alpha values. I developed a formula for alpha blending for alpha blending the black pixels in the drop shadows with the background color (153,153,153) but I didn't allow for the colored pixels with alpha values. So I developed a new formula as such. It involves float variables.
In this case bgvalue is 153. Color is the pixel element . Alpha is the alpha value of the pixel we are blending. We have to blend each R,G,B pixel element separately. The alpha blend function returns each integer value one each for red, green and blue. The formula I used is:
float a = ((float)alpha/255.0f);
float value = (float)(Color*a) + (float)(bgvalue*(1-a);
int newcolor = (round) value;
The pixels on an AROS RTG window rasterport are RGB colors which have been alpha blended with the background color.
Reading a 32 bit glow image from the rasterport is more difficult. But if you know the HSL values for the glow border it's easier to decide which pixels have alpha values. But in that case a new formula is needed to reverse the alpha blending before saving the rasterport data to file.
Edited by miker1264 on 09-02-2026 21:40,
3 months ago
miker1264 attached the following image:
While doing AROS programming in the past I would work on several projects at a time. I would spend a little bit developing each project, making some advancement and adding new features then more on to the next project. But I never really finished a project so that I could release it and post it for others.
This time around I will focus on spending as much time as needed on one project at a time to develop it as far as possible then release it. Then I will work on another project. So I will be working on Icon Builder for a while, maybe for the next few months to add some new features.
The next project after that I will work on Icon Drop to add all the new features that I'm developing for Icon. Builder which is my test program at this point. Icon Drop will have a few buttons, two display areas and a menu system. All the buttons in Icon Builder will be just one menu item. That will be "Add Glow Border".
The first four menu items for Icon Drop will include that and "Add Drop Shadow", "Adjust Brightness" and "Change Glow Tint". Icon Builder is the test program but Icon Drop will be updated and released in a few months as a full featured program.
Edited by miker1264 on 10-02-2026 11:10,
3 months ago
miker1264 attached the following image:
Thanks retrofaza!
Icon Drop may be the program for that. It will be an easy way for people who aren't graphic artists to produce nice looking icons in the style of Ken's v4 icons.
If you port a game or write a demo or a program and you need an app icon you would need a way to make one. If you're just good enough with a paint program to paint a nice looking ARGB image and save a PNG what's the next step? How to add a drop shadow? Or a glow border? That's when an icon program can do that all for you.
Edited by miker1264 on 10-02-2026 14:12,
3 months ago